How to Uninstall Apps on Mac
Written by: BestApp.com App Testing Team - Updated: May 5, 2022
If you’re running low on storage space on your Mac, one of the quickest and easiest ways to create space is by uninstalling your lesser-used apps. Mac apps can take up a significant amount of storage space on your system, but fortunately Apple makes it easy to uninstall apps using a few simple methods.
After uninstalling apps, you can also take extra steps to remove leftover files and make sure your Mac is free of any unnecessary junk. While uninstalling should remove most of these files, there may still be leftover user data and other files stored on your Mac.
Here’s everything you need to know about how to uninstall apps on Mac.

(Image source: https://unsplash.com/photos/BOADhrSdAF0)
Why Uninstall Apps on Mac?
Users may choose to uninstall apps on Mac for a variety of reasons. Uninstalling apps can help you:
- Restore an app’s default settings
- Create more storage space
- Delete personal data stored in an app
- Resolve bugs and other issues in an app
- Improve your Mac’s speed and performance
- Troubleshoot issues on your Mac
- Restore your Mac to its original state if you plan to sell it
Uninstalling apps on Mac is an easy process, and if you ever decide to redownload an app, you can do so quickly by redownloading the installer online or from the App Store on your Mac.
Can You Uninstall Native Mac Apps?
Macs and MacBooks come with a number of preinstalled apps, including Photos, Mail, GarageBand, Notes, and others.
Some apps, like iMovie and GarageBand, can be uninstalled just like any third-party app using the methods described below.
Others, though, are considered more essential to maintain your device’s functionality, and as a result, cannot be deleted — at least not with the methods outlined here. These include apps like Photos and Safari. When you try to delete these apps, you’ll see a message that states the app “can’t be modified or deleted because it’s required by macOS.”
While there are some workarounds to delete certain apps that macOS won’t let you delete, doing so is typically ill-advised as it can have a negative impact on your system’s performance. Apple prevents users from uninstalling these apps so that inexperienced users don’t accidentally damage the integrity of the system.
How to Uninstall Apps on Mac With Finder
The first and fastest way to uninstall apps on Mac is to use Finder, which makes it easy to quickly locate apps and files stored on your computer.
Start by opening Finder, then find the app you want to uninstall by using the search bar in the Finder toolbar, or select the “Applications” folder in the sidebar and look for the app there.
Alternatively, you can use Spotlight to search for the app by pressing command (⌘) + space bar, then typing the name of the app. While in Spotlight, press and hold the command (⌘) key while double-clicking the app to open the app in Finder.
![]()
(image source: Apple)
After locating the app, right-click the app icon and select “Move to Trash,” or drag and drop the app icon to the Trash app located in the Dock.
You may be prompted to enter your username and password before deleting the app. This is the same username and password you use to log into your Mac. Enter your details to confirm, then empty the Trash by opening the Trash app and clicking “Empty” in the top-right corner.
How to Uninstall Apps on Mac With Launchpad
If the app you want to uninstall was downloaded directly from the App Store, then you can also use Launchpad to uninstall it.
Open Launchpad by selecting it in the Dock or locating it in your “Applications” folder. If you have trackpad gestures turned on, you can also pinch closed with your thumb and three fingers to open Launchpad.
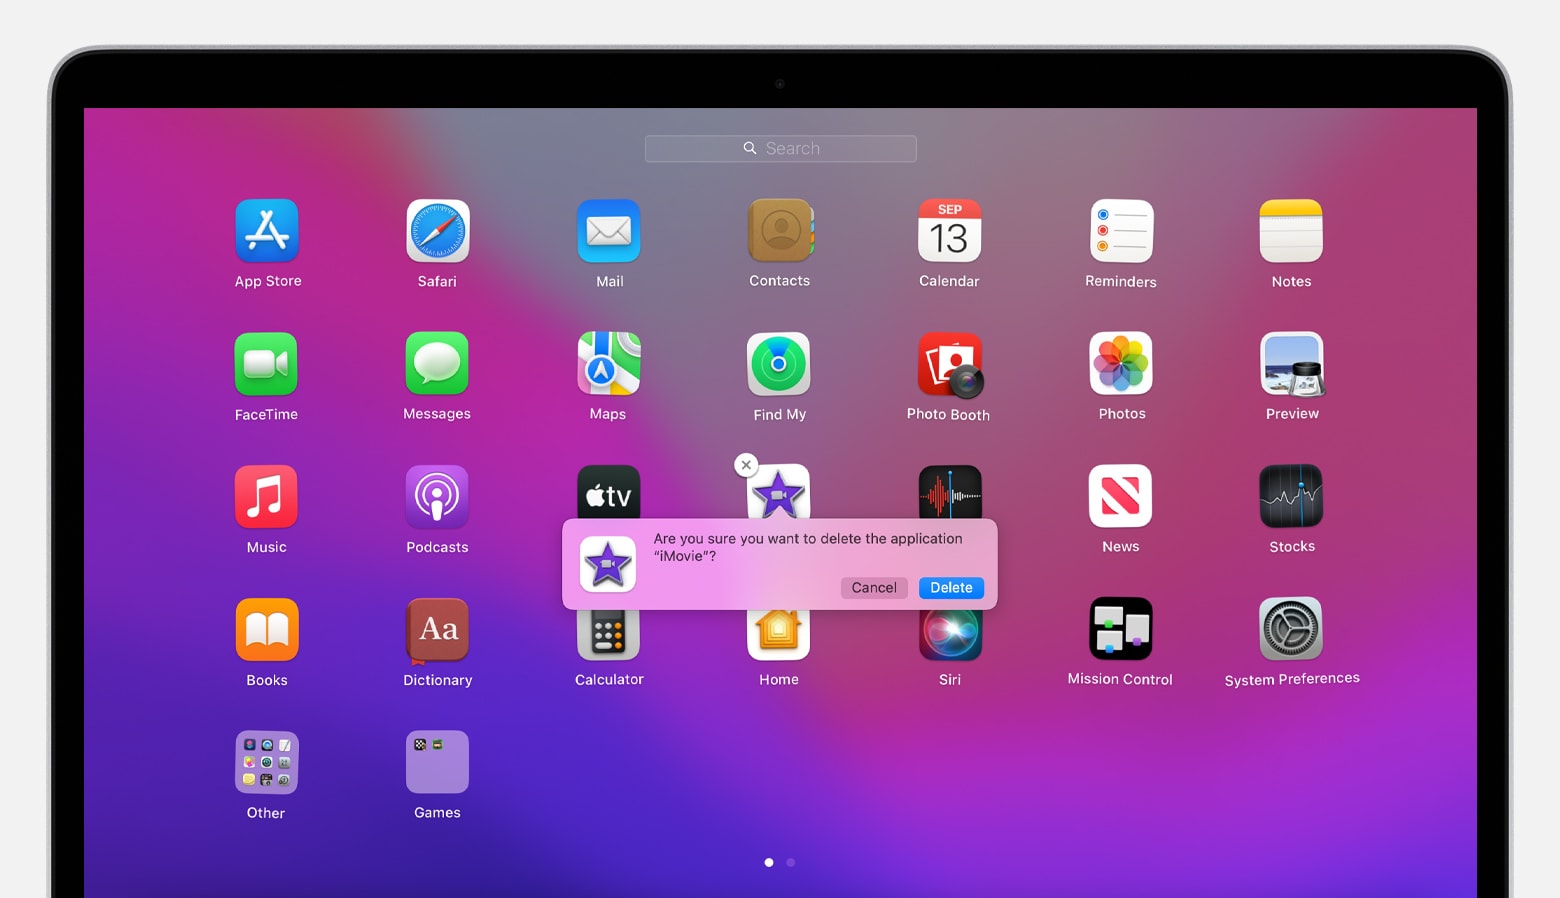
(image source: Apple)
In Launchpad, click and hold any app or press and hold the option (⌥) key until all the apps start to jiggle. Apps downloaded from the App Store should have an “x” icon in the top-left corner. Click this icon, then “Delete” to uninstall the app.
Any apps that don’t have the “x” icon when they start to jiggle either did not come from the App Store or are required by your device.
Using an App’s Native Uninstaller
Some third-party apps also include built-in uninstallers you can use to remove the app from your Mac.
To check, open Finder, then search for the app or find it in your “Applications” folder. If the app has its own folder (rather than simply appearing as an app icon), open the app folder and look for a separate folder or icon with the title “Uninstaller” or “Uninstall [App].”
Then, simply launch the uninstaller and follow the on-screen instructions to remove the app from your device.
How to Remove Leftover App Files
When you uninstall an app, it will remove most of its data and files, but in many cases there will still be leftover preference and support files stored on your computer. In most cases, it’s not worth taking the time to delete these files, as they take up very little storage space and are useful if you ever decide to redownload the app or download a newer version of the app.
If you do want to clear your Mac of all unused files, though, you can do so pretty easily by knowing what to search for in Finder.
Remove application support files
To delete application support files, start by opening Finder, then click “Go to Folder…” from the menu at the top of the Finder window.
In the text field, type or paste “~/Library/Application Support/[App Name].” This will open a folder with the application support files.
Delete everything located in this folder to remove the app’s support files.
Delete preference files
Next, you can delete preference files for any given app using Finder. Preferences include your user settings, so if you plan to redownload the app, you may not want to delete these files. However, deleting them will have no negative impact on your system.
Like the previous step, start by opening Finder and selecting “Go to Folder…” and type or paste “~/Library/Preferences/.”
After navigating to the “Preferences” folder, use the Finder search bar to search for the name of the app you uninstalled. This should bring up any preference files associated with the uninstalled app.
Delete these items by moving them to the Trash app located in your Dock, then emptying it.
Delete caches
To delete app caches, open Finder, then select “Go to Folder…” as you did in the previous steps.
Next, type or paste “~/Library/Caches/[App Name].” If nothing comes up after using the app name, try using the name of the app’s developer instead.
Delete the contents of this folder to delete the caches associated with the uninstalled app.
Other leftover files
In addition to caches, preferences, and support files, there are other files that may be stored separately on your Mac.
To remove these, open Finder and click “Go to Folder…,” then search for the following folders. Empty their contents to remove all files associated with an uninstalled app.
• Plugins found in “~/Library/Internet Plug-Ins/”
• Crash report files found in “~/Library/Application Support/CrashReporter/”
• App saved state files found in “~/Library/Saved Application State/”
After opening these folders, make sure each file you remove includes the name of the correct app.
While these are some of the most common hidden files that may be leftover after uninstalling an app, there are often others located elsewhere on your system. However, in many cases, your Mac won’t let you delete certain files in order to protect the integrity of the system.
If you’re not sure whether a file is safe to delete, it’s better to leave it alone rather than potentially damage your system’s functionality. Only remove apps or files if you’re sure of what they are. Deleting the wrong system files could have potentially negative consequences.
How to Force Quit Apps on Mac
Knowing how to force quit apps on Mac can be very helpful for a number of reasons. If an app is frozen and won’t quit, is running slowly, or can’t be deleted due to being open, force quitting is often the solution.
To force quit an app on Mac, click the Apple logo in the top-left corner of your home screen. From the dropdown menu, click “Force Quit.”
From the Window that appears, choose the app you want to shut down, then click the “Force Quit” button to close the app.
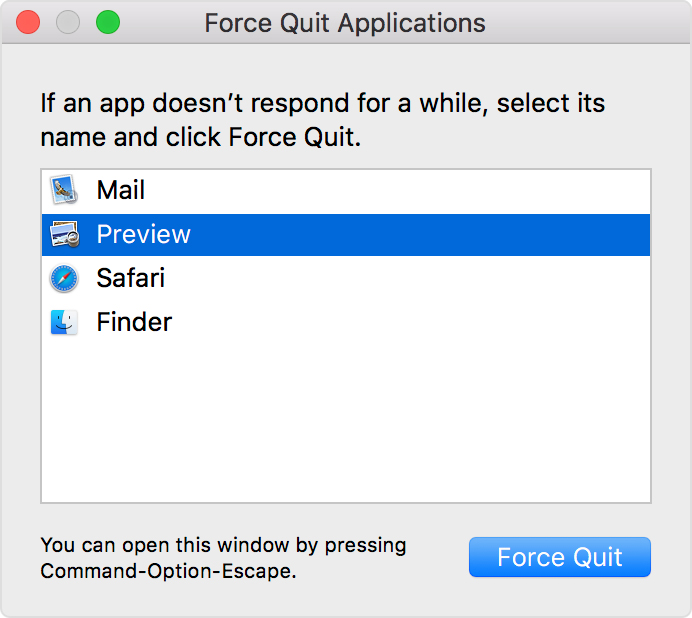
(image source: Apple)
Alternatively, you can use a keyboard shortcut to open the Force Quit menu. To use this shortcut, press the option (⌥), command (⌘), and escape keys at the same time. Then, select the app you want to close and click the “Force Quit” button.
After force quitting the app, try uninstalling it again by moving it to the Trash. If it still won’t uninstall, it may be because it’s one of the apps that macOS won’t let you remove.